How to Paint Kitchen Cabinets Like a Pro in 9 Simple Steps

To paint kitchen cabinets like a pro, start with thorough cleaning and sanding, remove doors and hardware, apply a high-quality primer, sand between coats, and use premium cabinet-grade paint. Proper drying time, flat-surface painting, and careful prep are what separate long-lasting professional results from short-term DIY finishes.

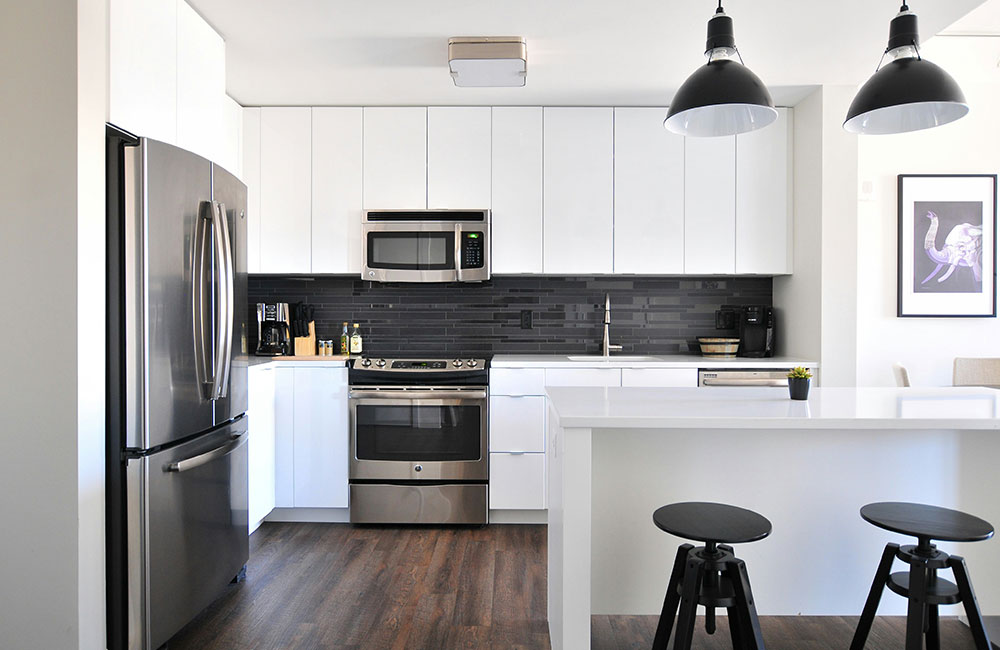
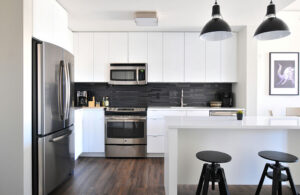
Kitchen cabinet painting is one of the most effective ways to transform a kitchen without the cost of a full remodel. When done correctly, painted cabinets can look factory-finished, resist wear, and last for years. When done poorly, they chip, peel, and show brush marks within months.

This guide breaks down professional kitchen cabinet painting into clear, manageable steps, so you understand what’s involved and why many homeowners ultimately choose kitchen cabinet painters near me for flawless results.

Key Takeaways

  • Cabinet prep determines 80% of the final result
  • Flat-surface painting prevents drips and brush marks
  • Sanding between coats creates a smooth, durable finish
  • Cabinet-grade primer and paint are non-negotiable
  • Professional methods significantly extend paint lifespan

Step 1: Create Flat Surfaces and Set Up a Work Area

Professional kitchen cabinet painting always starts with removing cabinet doors, drawers, and hardware. Painting cabinets while they’re mounted leads to uneven finishes, drips, and visible brush lines.

Lay doors flat on drop cloths or drying racks in a dust-free, well-ventilated area. Flat surfaces allow paint to level naturally, producing the smooth finish homeowners expect from professional kitchen cabinet painting.

Why this matters: Gravity works against vertical painting. Flat painting ensures consistency and durability.

Step 2: Prep Your Kitchen Cabinets for Painting

Preparation is where most DIY projects fail. Cabinets accumulate grease, residue, and oils that prevent paint from bonding.

  • Clean surfaces thoroughly with a degreaser
  • Rinse and let cabinets dry completely
  • Lightly sand using 100–150 grit sandpaper
  • Remove dust with a damp microfiber cloth

You’re not stripping the cabinets—just creating enough texture for primer to grip.

According to Benjamin Moore, poor surface prep is the leading cause of cabinet paint failure.

Step 3: Protect Your Surroundings

Before priming, protect countertops, floors, appliances, and walls.

  • Use drop cloths or rosin paper
  • Apply painter’s tape along edges and seams
  • Seal off adjacent rooms if possible

Professional crews spend significant time masking because overspray and drips are far harder to fix than prevent.

Step 4: Apply Cabinet Primer

Primer is the foundation of long-lasting kitchen cabinet painting.

Use a high-adhesion, stain-blocking acrylic primer designed for cabinets. This ensures:

  • Paint sticks properly
  • Dark colors don’t bleed through
  • The finish cures evenly

Apply primer with a microfiber roller on flat areas and a high-quality brush for edges. Allow at least one hour of dry time—longer if humidity is high.

Step 5: Sand Your Cabinets Again

Once the primer dries, lightly sand with 220-grit sandpaper.

This step:

  • Removes roller texture
  • Levels dust particles
  • Ensures a smooth topcoat

Wipe clean before painting. Skipping this step is one of the biggest differences between amateur and professional kitchen cabinet painting.

painting prep work

Step 6: Paint Kitchen Cabinets for a Fresh Look

Use cabinet-specific paint designed for durability—not standard wall paint.

  • Roll flat panels with a microfiber roller
  • Brush edges and profiles carefully
  • Apply thin, even coats

Allow full drying time between coats. Rushing leads to fingerprints, sagging, and premature wear.

Consumer Reports notes that cabinet-grade paints last up to 2× longer than standard interior latex when applied correctly.

Step 7: Sand Between Coats (Again)

After the first paint coat dries, sand lightly with 220-grit paper.

This removes:

  • Minor drips
  • Roller stipple
  • Surface inconsistencies

Professional painters repeat this step to achieve that smooth, furniture-like finish.

Step 8: Apply the Second Coat

The second coat delivers full color depth and durability.

At this stage, technique matters more than speed. Thin, even coats cure harder and resist chipping better than thick applications.

This is where kitchen cabinet painters near me truly stand out—consistent pressure, proper coverage, and zero shortcuts.

Step 9: Let Cabinets Cure Fully

Drying is not the same as curing.

  • Minimum drying time: 24 hours
  • Ideal cure time: 48–72 hours

Reinstalling doors too soon can cause sticking, dents, or surface damage. Professionals schedule reinstallation only after proper curing.

Common Mistakes That Ruin Cabinet Paint Jobs

  • Skipping primer
  • Using wall paint instead of cabinet paint
  • Painting vertically
  • Rushing dry times
  • Not sanding between coats

These mistakes explain why many DIY cabinet jobs fail within the first year.

When to Hire a Professional for Kitchen Cabinet Painting

DIY cabinet painting requires:

  • Specialized tools
  • Controlled environments
  • Significant time and patience

Professional painters reduce risk, eliminate redo costs, and deliver finishes that last years longer.

The National Association of Realtors reports that professionally painted cabinets can deliver up to 70% ROI compared to full cabinet replacement.

Read Also: Why CBS Professional Painters is the Best Cabinet Painting Contractor

FAQs

  1. Can I paint kitchen cabinets without sanding?
    No. Sanding is critical for paint adhesion and long-term durability.
  2. How long does kitchen cabinet painting last?
    Professionally painted cabinets can last 8–10 years with proper care.
  3. Is professional kitchen cabinet painting worth it?
    Yes. Professional prep, materials, and technique dramatically reduce chipping and peeling.

Why Homeowners Choose CBS Pro Painters

CBS Pro Painters delivers professional kitchen cabinet painting using proven systems not shortcuts.

Homeowners choose us because we offer:

  • Cabinet-specific prep and coatings
  • Dust-controlled sanding methods
  • Clean, protected workspaces
  • Long-lasting finishes that resist wear

If you’re searching for kitchen cabinet painters near me, our process is designed to deliver results that look brand new without replacing your cabinets.

Ready to Upgrade Your Kitchen?

CBS Pro Painters specializes in high-quality kitchen cabinet painting that transforms kitchens without the cost of remodeling. If you’re searching for trusted kitchen cabinet painters near me, contact CBS Pro Painters today for a professional consultation and lasting results.